
Can a rooflight go into an existing flat roof?
Adding a rooflight in existing flat roof coverings of felt, EPDM or GRP is a routine job when the deck is sound and the joists can be trimmed round an opening. The roof does not need to be new, and it does not need to be rebuilt. What it needs is a careful sequence: protect the room, open the roof, frame the hole, build the kerb, set the unit and carry the covering up and over the kerb so water cannot get behind it.
Homeowners usually call the result a flat skylight, and fitters call it a rooflight. The room it serves is typically a back kitchen, a rear extension, a flat-roofed offshot or a bathroom, all places where the walls leave the middle of the floor short of natural light.
This page covers the roof side of the job: the structure, the kerb, the falls and the three common coverings. If you are still choosing between a low flat unit and a pitched one, read flat rooflight or roof lantern first.
When the answer is not yet
A deck that has gone soft, a covering that is at the end of its life, or standing water that never clears all need dealing with first or alongside. A rooflight set into a failing roof inherits the failure. When we see that on the roof, the quote deals with it as part of the job, so the new unit is weathered into a covering that will last.
What we look at on the roof before the first cut
Four things decide where an opening can go and how much work it brings. We note each of them from on top of the roof and from the loft or ceiling void underneath.
- The joists: which way they run, how far apart they sit and how deep they are.
- The deck: its material and whether it is sound, because a rotted board cannot hold a kerb.
- The covering: felt, EPDM or GRP, its age and how it has been laid at the edges.
- The water route: which way the roof slopes and where the outlet or gutter sits.
The ceiling void tells us whether there is pipework, wiring or ducting in the way, and how deep the shaft between ceiling and glass will be. A deep build-up of joists and insulation makes that shaft long, and a tall shaft shrinks the pool of light on the floor unless the reveal is splayed outwards.
Photographs help us prepare, but a flat roof hides its faults under a skin of felt or rubber. That is why the measuring happens on site.
A flat roof hides its deck under the covering, so the true condition only shows once someone stands on it.
Cutting the deck and trimming the joists
Before anything is cut, the room below is cleared and sheeted, and the roof is protected so the opening is never left to the weather. The covering is cut back from the opening line, the deck boards come out, and the ceiling below is opened to match.
Cutting the opening changes how the roof is carried, so this is structural work and counts as notifiable building work. We make the Building Control notification ourselves. Where the opening can sit between two joists, the framing is limited to short timbers, called trimmers, across the gap. A joist that the opening crosses is cut, and its ends rest on a heavier trimmer that hands the load to the joists either side. A very wide opening can need a deeper timber or a steel beam.
Choosing the position
If you can pick where the rooflight goes, the position that keeps the framing small is usually between two joists, clear of the roof edge and the outlet. The lighting need comes first, though, and in a deep extension the right place is over the stretch furthest from the garden doors, even if it costs a little more framing. The two ideas are weighed together on site.
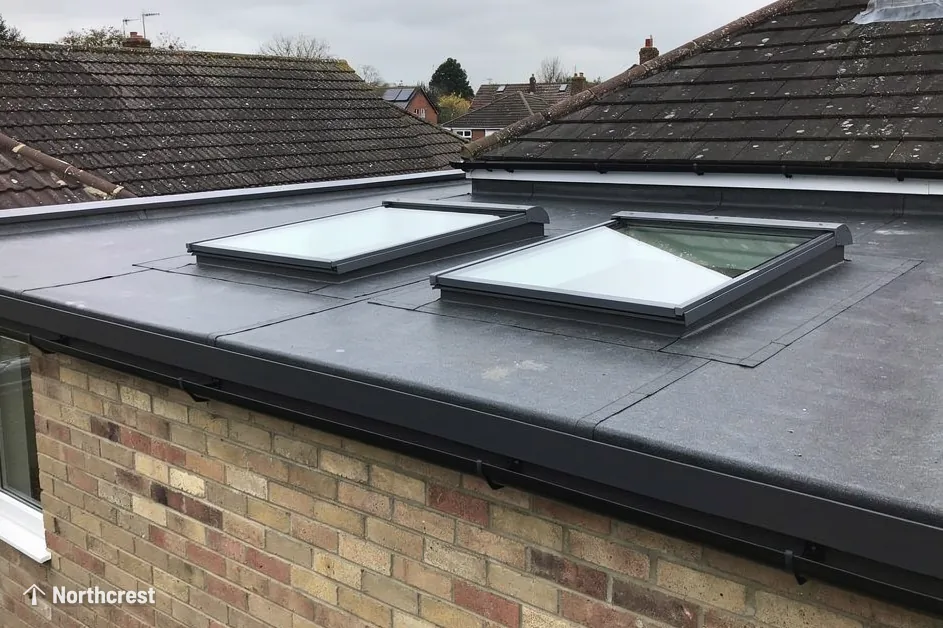
Two smaller openings can suit a long room better than one large one, and each can sit neatly between its own pair of joists. The price of that choice is a second kerb and a second junction to weather.
The ceiling below
The ceiling is cut from underneath once the roof side is ready to be closed. Cables and pipes that run across the line of the opening are moved first, and plasterboard edges are supported so the reveal has a firm base to take its finish.
Building the kerb
The kerb is the low box that the rooflight frame sits on. It is built from timber, fixed to the deck and the trimmers, and insulated so that cold does not run through it into the room. The finished height matters. It has to rise far enough above the finished roof covering for the upstand to turn up it and sit under the unit's frame with room to spare, and it also has to stay inside the planning limits for a rooflight on a house.
Under Class C, a house rooflight is generally permitted development when it stands 150mm or less above the roof's surface and stays within the roof's overall height. The kerb counts towards that figure, so the kerb and the unit are measured together. A flat or maisonette cannot rely on Class C, and the council can say whether permission is needed. The conditions are listed in full in the skylight planning guide.
Level, square and the right size
A glass unit is bonded to its frame with little tolerance, so the kerb must be level and square. A listed size can be measured at either face of the kerb depending on the maker, so the drawing is checked against the finished kerb before the unit is lifted into place. If the roof already carries an old plastic dome, its kerb may be a low or light one that will not suit a glass unit, and it is raised, strengthened or rebuilt.
Falls, outlets and where the rain goes
No flat roof should be truly level. It falls gently towards an outlet or a gutter, and everything on it has to respect that line. A kerb that stands across the fall acts like a small dam: water collects against its upstream face and sits there, which a covering is not meant to do.
We work out where the water travels and place the kerb so that rain runs round it. On a roof with a shallow fall, a small timber wedge, sometimes called a cricket, built against the upstream side of the kerb sends the water either way round. Where the opening has to sit across the fall, that wedge is part of the job from the start.
The outlet and the gutter matter as well. If the roof drains close to the planned position, the kerb sits clear of the outlet so leaves can be cleared without disturbing the weathering. The same goes for parapets and walls that rise above the roof: the kerb needs a margin from them, because the covering has to turn up both faces and be accessible.
Weather, sequence and what the day looks like
Flat roof work is planned around the weather, because the one thing the roof cannot do is stay open in the rain. A rooflight job on an existing roof follows a set order, and each stage ends with the roof closed to the weather:
- Protect the room below and the roof around the work.
- Cut back the covering and the deck, then open the ceiling.
- Frame the opening with trimmers and, where needed, a larger timber.
- Build, insulate and level the kerb.
- Dress the covering up the kerb and add the cover flashing.
- Set and seal the unit.
- Line the reveal, plaster it and decorate it.
A small opening between two joists can go through the first six steps fairly quickly. A wide opening that crosses several joists, or a roof that needs its covering renewed round the kerb, takes longer, and we agree the plan with you at the survey. Plastering needs drying time before paint, which is why the room is finished in a separate stage.
Access and the neighbours
Materials reach the roof by ladder, scaffold or hoist, and a terrace with a shared passage or a back-to-back yard needs thought about where things are stacked. We note the route at the survey and agree where debris is stored, so the neighbours are not left with a skip against their gate. If a party wall is involved, the work close to it is planned to keep disturbance low.
Making the covering good round the kerb
The covering is where a rooflight junction succeeds or fails. Each of the three common coverings meets the kerb in its own way, so the weathering follows whatever is already on the roof.
| Covering | How it is laid | At the kerb |
|---|---|---|
| Built-up felt | Layers lapped and bonded | Turned up the upstand, tucked under a flashing |
| EPDM rubber | One sheet, adhered to the deck | Bonded to the kerb, folded at the corners |
| GRP fibreglass | Laid wet as a continuous skin | Runs up the upstand as part of the same skin |
Where the existing surface is sound and recent, the new junction is made to match it. Where it is old, brittle or already failing, we recommend renewing the covering round the opening so the junction does not sit in an old skin that will not bond. Ask at the survey who will lay the covering round the kerb, so that nobody assumes the job belongs to someone else.
Flashing and the cover strip
A cover flashing, a metal strip fixed over the top of the upstand, keeps rain from running behind the covering. It is fixed to the kerb, sealed along its upper edge and lapped so that water moves down and away. On a GRP roof the upstand itself is the barrier, and the cover strip protects its top edge.
Inside the room, and how the job is closed
The opening in the ceiling is lined, and the reveal is plastered, then decorated as quoted, so the room is left finished. The reveal can be square or splayed outwards at the ceiling, and splaying gives more of the floor daylight when the shaft is deep.
If the roof insulation does not run right up to the kerb, heat leaks round the glass and shows as condensation on the reveal in winter, so the insulation is continued to the kerb and sealed. In the finished room the reveal should look like part of the original ceiling.
Once the free survey is done you receive a fixed quote naming the room, the unit and how big it is, and our 10-year workmanship guarantee covers the work. You can send the details through the quote form, with a photograph of the roof if you have one.